During the coronavirus outbreak, I'm vowing to go live on YouTube every morning at 8am PT (11am ET) in an effort to help and support those in need at this time. Plus, it holds me accountable to waking up in the morning and starting the day with service to others.
Every day, I have lots of people asking me what equipment I use to host my live streams, so I put together this helpful list below. I describe each item and how it's used. Also, a lot of the links below are affiliate links, which means I earn a little extra cash (at no extra cost to you!) if you purchase those items. Thanks in advance for your support!
Additionally, I include lower cost / budget options to potentially achieve the same results, since I do tend to use more than one would need to get started. Please don't think you have to spend a TON of money to go live. In fact, you could potentially just use your phone and that's it. However, I also know you like the bells and whistles, too, so let's get started with the software that I use to live stream with:
Ecamm Live (Live Streaming Software)
Ecamm Live (for Mac Users only – see OBS if you're on a PC) is what I use to GO LIVE to YouTube, although you can also choose to go live on Facebook, Twitch, Periscope, Restream.io (multi-stream), Switchboard Live (multi-stream), and more. I choose to focus just on YouTube, however, so that I can cultivate and hone in on my community there.
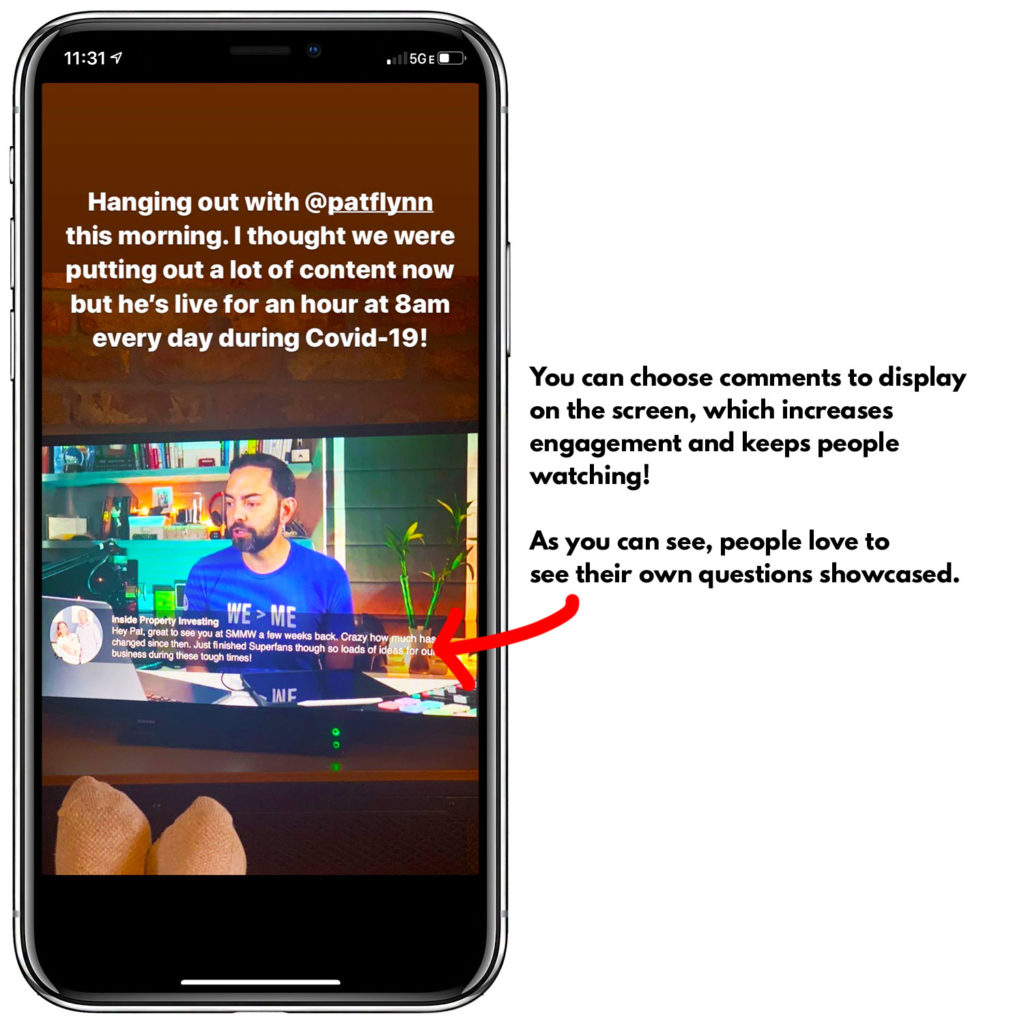
With Ecamm Live, you can do some fun things like add overlays on top of your streams (like text and images), change between cameras, add sound effects, and even show comments from your viewers that you may be answering.
Ecamm Live is awesome right out of the box and you can go live in an instant after connecting your accounts (i.e. YouTube, Twitch, etc.), your camera, and your audio input. More on those items later.
While broadcasting, you can even switch between scenes, which are different camera angles (if you have multiple cameras connected), screen sharing (your computer desktop) and even an iPad Pro. You can also play pre-recorded videos.
Finally, you can even use Ecamm Live as a “Virtual Camera”, meaning that when you go live elsewhere, such as Zoom for a conference call, you can stream through Ecamm and have access to all of the great tools that are available.
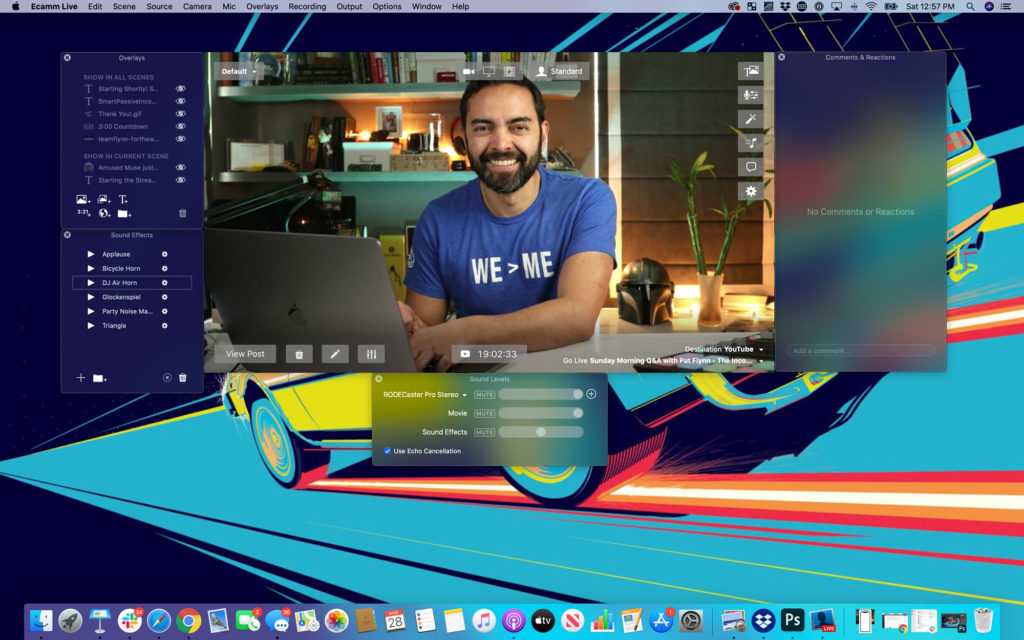
Here's what my desktop looks like when I'm about to go live. Effects and layovers I put on the left, comments come in on the right (imported from the channel you're broadcasting on), and a preview of what viewers will see are on the main view in the center. You can, however, customize the layout yourself:
Ecamm Live is definitely my go to if you're on a Mac Computer (desktop only), and if you're on a PC, I recommend checking out OBS, although I personally do not have any experience with it.
Camera Setup
I currently stream with only one camera, although I know a lot of people who stream with many. I do, however, go a little high-end here for a streaming camera.
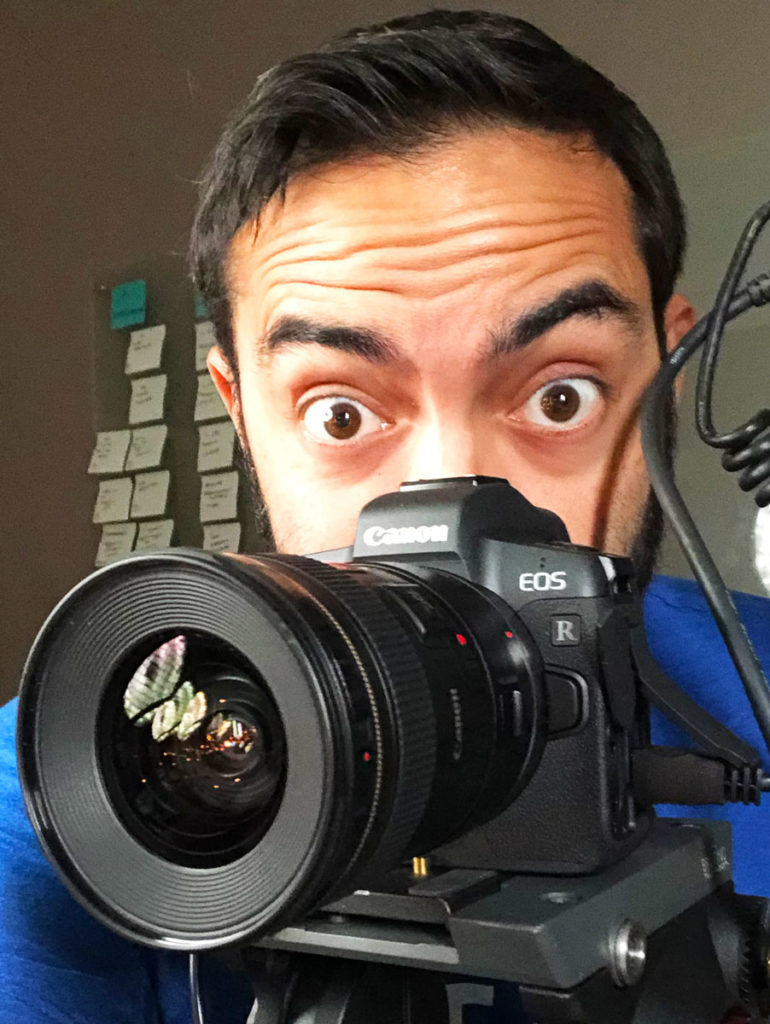
I'm using the Canon-EOS R Mirrorless DSLR with a Canon EF 20mm f/2.8 USM Wide-Angle Fixed Lens, which gives me wider view, some nice blurring effect in the background, and a super clear shot – way better than any webcam could capture.
This is professional camera, of course, and a lot more expensive than a webcam. With that said, I do get a lot of use out of this camera like for filming my online courses, vlogs and YouTube videos, too.
In total, the camera and the lens combined runs about $2,200.
If you have a DSLR camera already, that could work, too. So long as it has an “HDMI out”. I formerly used the Canon Rebel SL2 DSLR, which is much cheaper at about $500, including a kit lens.
The issue with using a high-end camera like this is that it doesn't plug directly into your computer. You need something that will convert that signal and pop it into your computer and be seen as a selectable webcam for your video input.
The Budget Option
If you're just looking for something easy though, like a decent webcam, then I recommend the Logitech Brio, or the Logitech c920. Both are great (the Brio is wider and sharper – but more expensive), and both easily plug into your computer via USB and work right out of the box.
So how do you connect a DSLR camera to your computer? Here's what I use below, plus some other options, too:
HDMI Capture Device (From Camera to Computer)
The BlackMagic Web Presenter is the box I use that my camera plugs into via an HDMI cable.
This box, then in turn, has a USB cable that I plug into my computer. In my applications, I select the Blackmagic Web Presenter as the webcam I'm using, and boom – it works.
Unfortunately, this box is currently unavailable. Fortunately, however, there's are cheaper way to do it. Instead, use this Elgato Cam Link 4k USB capture device which works in the same way, and is about a third of the price at about $130. Alternatively, you can try this Magewell Capture Card, too.
Audio Setup
Video is just part of the equation. Your audio is just as important, too. Your microphone is the most important piece of the puzzle.
I use a Rode NTG 2 shotgun mic ($250), which looks like a long, but thin mic that sits just out of frame above me and points directly at my mouth. I love it because I don't need to wear anything (like a lapel mic on my shirt), and there's no microphone blocking my face either, like with most podcasting setups.
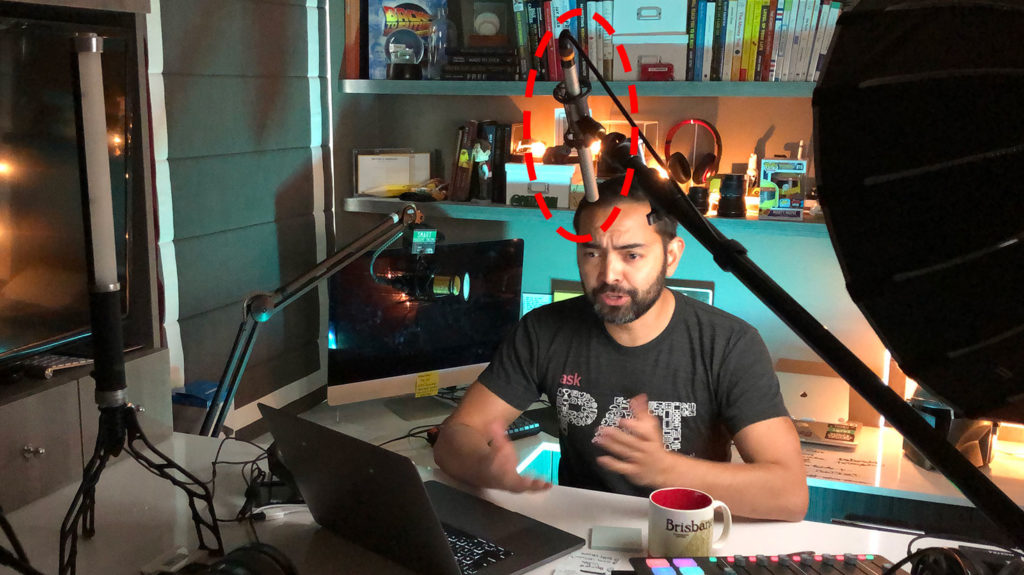
I don't use the foam cover that comes with the NTG mic (since I'm indoors and there's no wind), however as you can see, there's a lot more needed to properly use this mic.
You'll need a long XLR Cable (15′ is recommended), and a telescoping boom arm and stand to lift the mic overhead and out of the shot. But, you also need somewhere to plug the mic into, since it's not a USB microphone.
To connect a XLR microphone like the Rode NTG (or any other), I'm stoked to introduce one of my favorite pieces of equipment of all time, The Rodecaster Pro! I use it for both podcasting, and live streaming. Even recording the audio for my YouTube videos, too.
You can connect up to 4 XLR mics, it has a soundboard for effects (which is perfect for live streaming and I use ALL the time), you can connect a device via bluetooth to input other audio, can record into a micro SD card for high-quality podcasting, and finally it has all the built in sound optimization tools, like limiters, voice enhancers, etc.
Here's a not-so-technical review of my Rodecaster Pro:
The Rodecaster Pro connects to your computer via USB and you can select it as your audio input (and output, via headphones) in whatever program you're using, but again, if you're already using a USB mic, then this isn't necessary.
The Budget Option
(Note: if you'd like a more budget microphone that doesn't require all the additional equipment and plugs directly into your computer via USB, a common solution is the Blue Yeti. It's good because it can be places on your desk and you don't have to speak close into it, which covers your face, but it does pick up more room noise. You could, however, use my favorite beginner podcasting setup, which uses a Samson Q2U USB mic and other equipment that in total costs about $100).
And if you DO have an XLR microphone, but don't want to grab the Rodecaster Pro, I suggest using this USB interface from Scarlett instead.
Just do your best during your streams to keep the microphone out of the face, but still have it sound great. Some mics, like the Audiotechnica 2100, aren't so great unless you're right next to the microphone.
Lighting Setup
Having good lighting can mean the difference between a regular looking stream, and one that actually looks professional. Even with great camera equipment, unless the lighting is on, it'll still look poor.
And with great lighting, you can make cheap equipment look a lot more high end. Lighting, is everything.
The trick with lighting is this: you don't want overhead lights because then you'll look like a raccoon. Unfortunately, most rooms have overhead lighting, and that's it.
Below, you'll see a progression from overhead lights, to how I set up my own lighting and the equipment I use. These photos were taken on my iPhone with no editing or filters to change contrast or color.
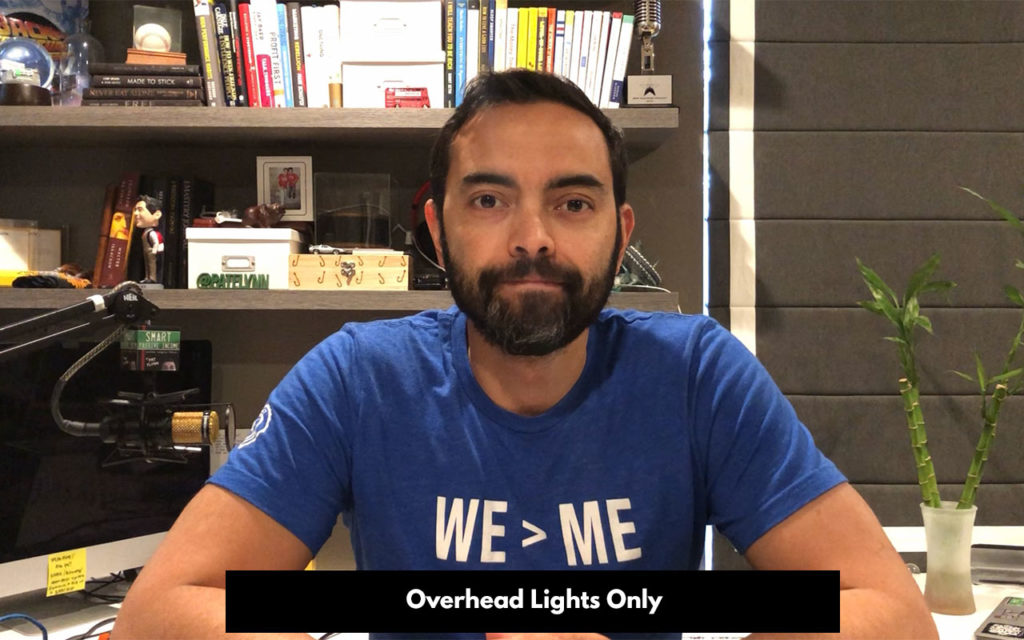
First, let's start with the baseline – overhead lights on, and everything else off:
Let's turn OFF the overhead lights because all they do is mess things up. We're going to add in a single light with a dome to wash one side of my face with some nice smooth lighting, which will also add a shadow on the other side of my face by my neck and chin, which will make my face “pop” much better.
Equipment used: Aputure Light Storm LS C120D Mark 2 120D with Aputure Light Dome II Studio Reflector Softbox and Godox Honeycomb Grid
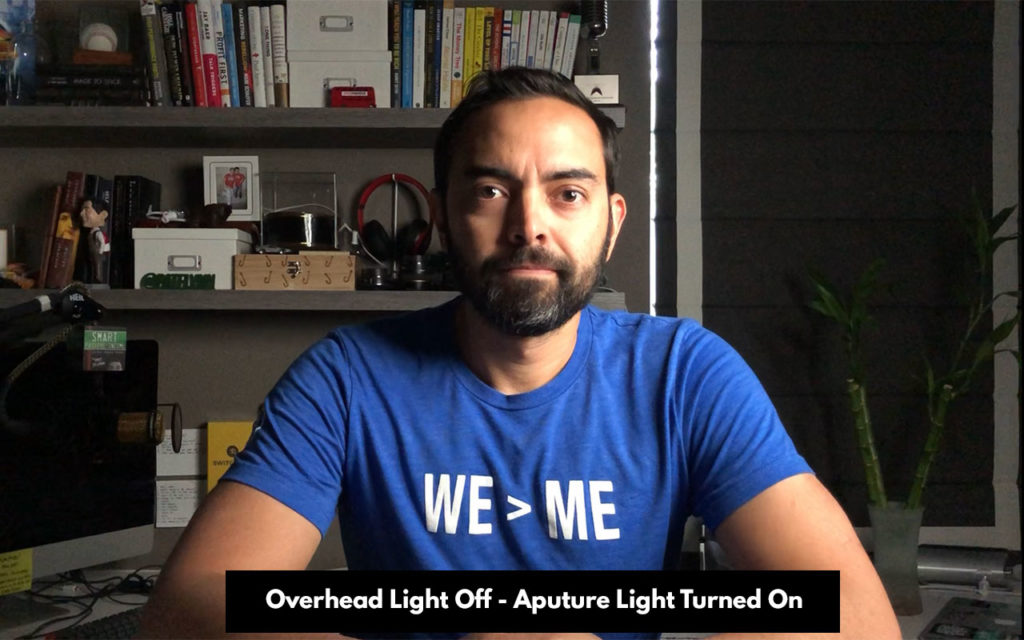
This is definitely a more “cinematic” look and usually is good enough to roll with. Notice the shadows on the left of my face (my right) and how much thinner my face looks. Yay shadows! The background is a bit dark, however, and I like to light that up in interesting ways. First, with some not-so-expensive string lights just to give a little more flavor and personality to the shot.
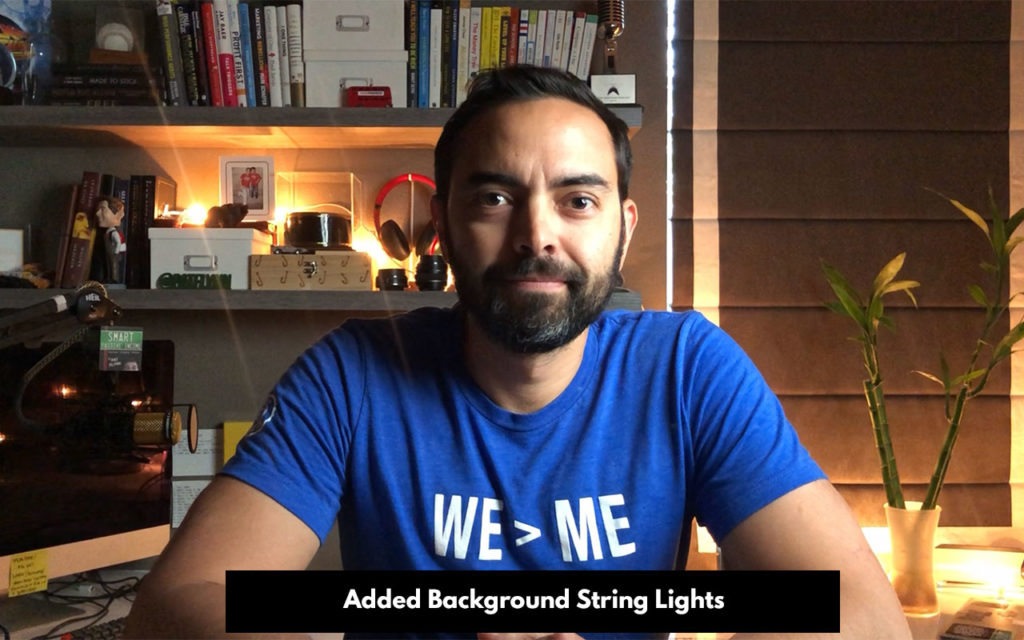
Then, I add a little splash of color (on the lowest setting), by introducing a colored LED light, positioned on a chair right behind me. I'm using a Sansi 70W RGB Flood Light (with remote) on a teal colored setting.

The above shot is what I use for my YouTube videos, which is still a bit cinematic. However, on Live Streams, I don't want it to be so contrast-y and dramatic, so I add a little wash of light on the other side of my face using a light called an ICE Light. You can really use any ol' LED light to “even out” tones like what you'll see below, but I like the ICE Light because it's nice and tall and covers a larger area. Plus, it looks like a light saber.
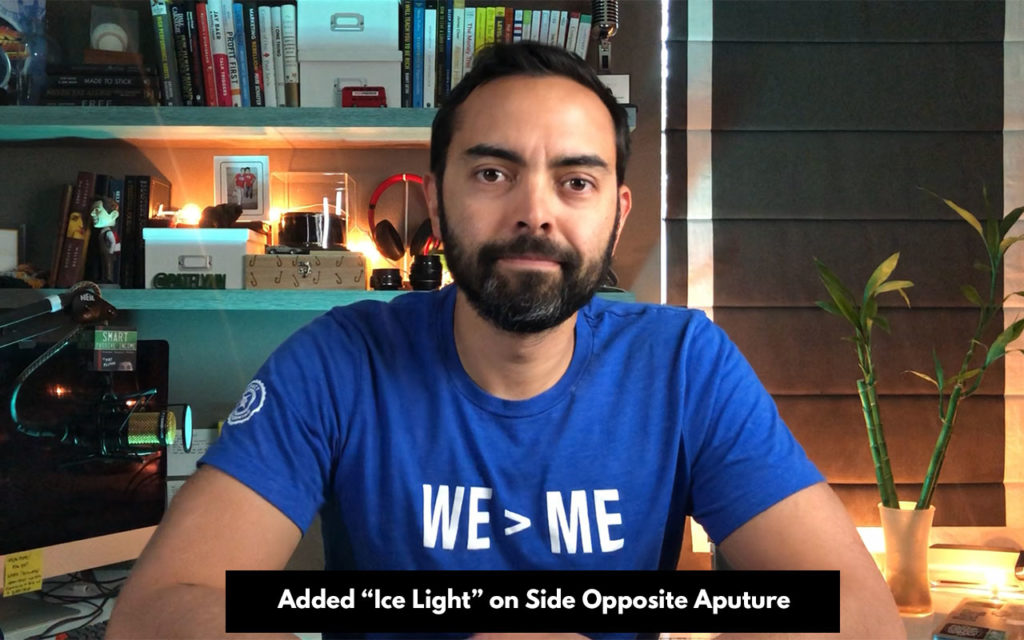
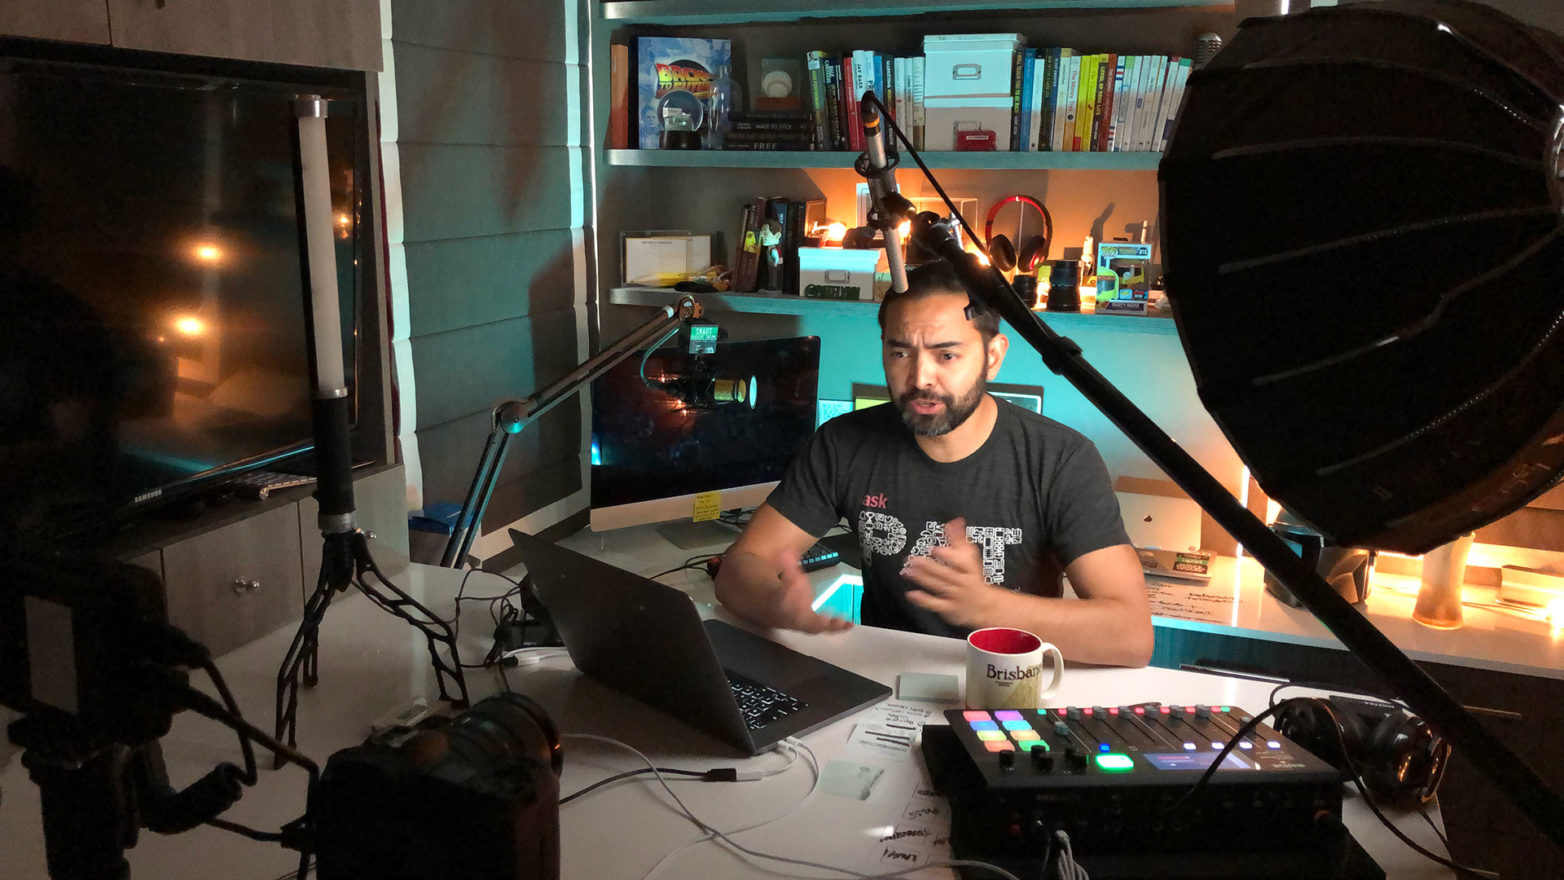
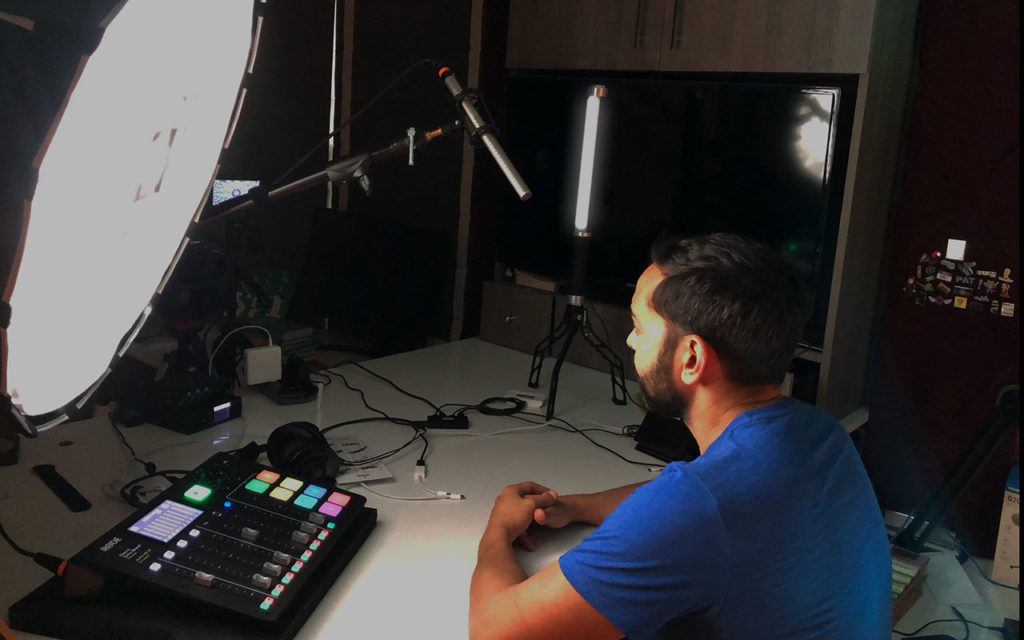
A little less “serious”, which is exactly what I want for a live stream. And here's the setup from behind the scenes so you can see it from the side: I've darkened the image so it's not so bright and you can see the lighting components in front of me.
The Budget Option
If you're just starting out, it may be as simple as starting with a good ring light to film through with your camera, or a starter softbox lighting set like this one.
Plus, I recommend you watch this video that my videographer, Caleb Wojcik, and I put together to help you through even more budget-friendly lighting options:
Stream Deck (Because, Buttons)
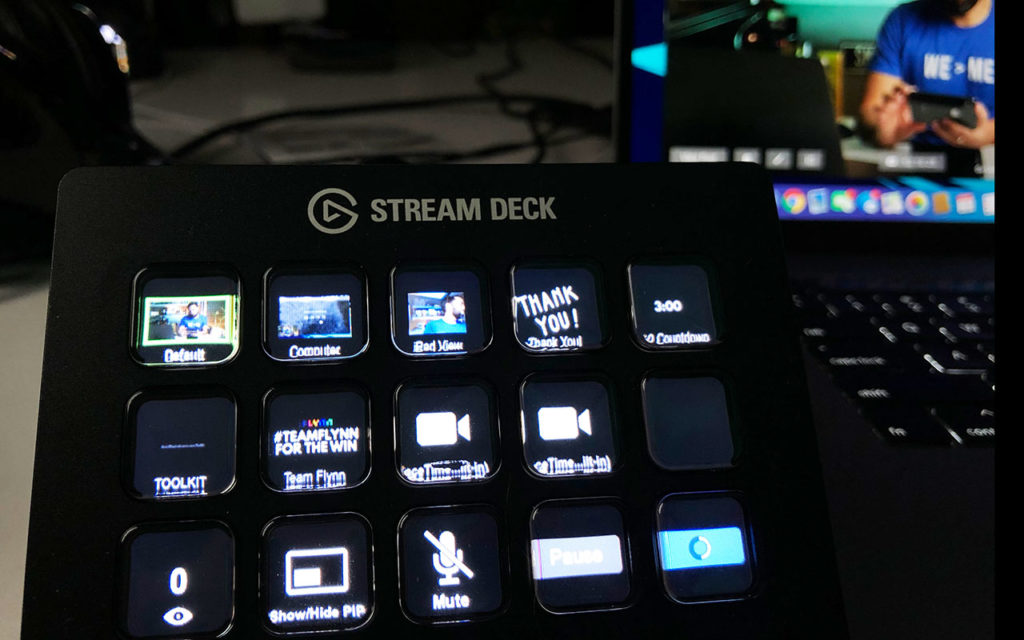
An Elgato Stream Deck is a great addition to any live steamer's arsenal. It provides a grid of buttons you can use for almost anything, from seeing your viewer count, to toggling on/off various overlays, switching scenes, and more. It's directly compatible with Ecamm Live (and OBS and several other live streaming tools), and makes it easy to run the show.
On my Stream Deck, I have buttons set to toggle my main camera angle, my screen share and my iPad view. I also have a countdown timer, some pre-written URLs, an animated “Thank You!” overlay, and other titles that I can toggle on and off with the push of a button. And the most useful button of all, the “End Broadcast” button, which can sometimes be hard to get to on the fly while streaming, and always leaves a streamer in that weird 10 second awkward pause after they say goodbye to the audience.
I have the 15-button Stream Deck, but you have some options. You can get the Stream Deck with 6-buttons ($80), 15-buttons ($150) or a massive 32-buttons ($240).
Budget Option
If you don't want to use the Stream Deck, you don't have to. It's totally optional, although very handy in my opinion if you're going to have repeat things you pop up on the screen. Most of the things you can do with the Stream Deck you can already do using the computer interface in Ecamm and other tools like OBS anyway, but you do have to search for them, and again – for audience engagement, you don't have to skip a beat when you have the buttons in front of you.
You can also use the buttons for other hotkeys you want to use on your computer, too. It's not just for live streaming.
Want to See it in Action?
I hope you enjoyed this list of tools I use to go live and the budget friendly options, too. All of this was learned from trial and error (and a lot of money spent), so if you're interested in getting some of this equipment, please consider using the links above which are tied to my affiliate account at Amazon. Thank you so much for your support!
If you'd like to see the set in action, please subscribe to my YouTube channel and catch me live on my show, The Income Stream, every morning at 8:00am PT (11:00am ET) and come join the #quaranteam and say hi!
Click here to subscribe and watch.
Cheers, and thanks again!
p.s. And if you're still scared of trying live streaming or video, why not learn how to start a podcast, instead?